Thursday, February 9, 2012


                              PART 2:    The Breast Collar

 
Here I've started the straps for the breast collar. I add the stitch marks to give it that finished look.


Skiver each piece.

The center piece is in place, now for the side silver.

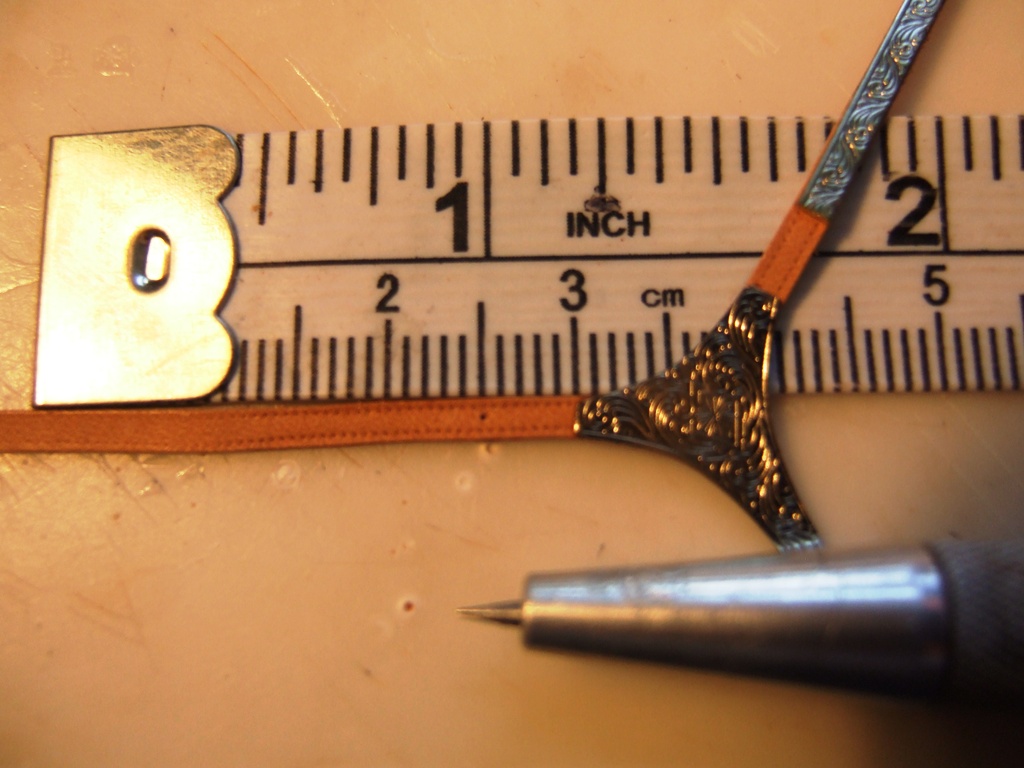
After adding the first silver strip I messure for the next one.

The mark on the leather tells me where the next silver strip will start.

Looking good!

This is the hardware for the the center strap to attach to the cinch.

The leather strap has a buckle at one end and the clip on the other.  Here I'm gluing the clip and ring to the strap.

All most done.  I've sealed it all with Tan Kote.
I added the straps to the breast collar that attaches to the saddle breast collar dee rings.  A beautiful piece to compliment the saddle.

Saturday, January 28, 2012

The makings of a Western Pleasure Saddle Set.
This is the base of the saddle.  I have Hand tooled the leather in to a Leaf and Basket weave pattern.  The edging is a stamp.  The silver corner plates are RioRondo pattern # P143.


I've set the saddle tree,  ( tree by Kirsteen Haley)and I am checking the stirrup dee rings for the stirrups to attach to.  This shows here that they are a little too far forward and they need to move back in the middle of the saddle seat.

I've added the upper back skirt, it will need to be trimmed a little to give room for the stirrup fenders.

A look at the saddle from above, this helps to see if it is centered.

I add silver tape to the rear of the cantle for a showy look.

The front angle, looks good!

This shows that the Dee rings have been moved back and the stirrups hang nicely.

The look is coming together now.

I've drawn on paper a pattern for the fender flaps. I'm also checking to see if I have room for the silver piece.

Here I've taken the pattern and cut out the fender flap in leather.  I'm gluing on the Silver corner piece with super glue GEL.  Be patient it needs to dry very well to hold.

After the glue has dried I wet the leather carefully by using a paintbrush dipped in clean water.  Don't get the silver wet, it loosens the glue.  Now that the leather is damp I use the bevel tool to make an edge.  Then I use a tool that makes the tiny sewing wholes on the edge. Not around the silver , this is not sewn on real saddles.

After I edge it I start my design.  I used a tiny hole stamp to make the design , then I used the bevel tool to make the tiny raised line that will seperate the next step.

A closer pic of the Fender Flap.

To make the leaf design I use the tracing paper I get from RioRondo.  I lay it down on the damp leather and draw the leaf.

I trace the leaves with a swival knife and press the edges with a plastic round ended tool.


I've added a basket weave design inside the raised edge then sealed it all with Tan Kote.

I've added the fender flap, it's beginning to come together now.

Here I'm checking the seat and stirrups with a Traditional size Breyer doll.


In this pic you can see the design, I try to make all my saddles OOAK.   I added the conchos and the cantle piece to finish  the seat. More to come.................................


Tuesday, January 24, 2012


Here I am judging at the Carolina Gold show in 2011.  This is one awesome show.  Julia and Robin know how to do it right.  I have my 3 hundred power glasses on so not to miss a thing. Many fine set ups in the performance classes.


 This set up is by Pat Hefty,  a wonderful performance shower.  She CM this pretty little pinto herself.  Truly a BLUE ribbon winner!


Friday, January 6, 2012

 By adding the finishing touches to this saddle makes it a complete look.

I added silver tips to the back cinch straps.

I have added the silver conchos.

I have a cinch ordered it will be the color of the dark stain.

Here I'm checking stirrup length with a tradional Breyer doll. I like it , it has a light bend at the knee and the heel of the doll is down.

Friday, December 30, 2011


This is the OF  Roping National Champion for NAN 2010 in Lexington, KY.  This is a OOAK PS Performance Horse model, I just loved this guy, he did super in all his classes.  I sold him to a gal in Washington State.   The calf is the  Herden running calf.  As you can see my set up looks just like the documentation I have on display.  I think it is important to have good documentation, take time to find the one that is just right!


This calf roping set up I used in the NAN 2008 show in  Lexington , KY.   The CM Lady Phase is by Chris Nandell.  She did a wonderful job on this gal.  I sold her to Karen Holland in Florida.  My tack is correct, and the double rope shows that a calf roper can use two ropes if need be.  My documentation here shows the double rope on the breast collar.  The doll is a Breyer Junior boy.  I did him up in blue jeans, white shirt , real boots with spirs and a black hat.  The calf is a Herden calf.   Winning the Reserve National Champion was a great honor. 


This is a roping saddle set I'm working on. 


 I like the wider look on the backcinch.


The order was to make it two tone.  I have used a brown stain and the same stain lightened with Tan Kote for the areas that is light.


 The stamp here is one I bought from RioRondo. 


The silver pieces are from RioRondo. I glue them on with Super Gel Glue.


 The saddle horn is wrap for the ropes,  with out this it is not a roping saddle.


Wednesday, December 7, 2011


                                              Bridles


This Headstall is 1/16 leather with silver beads. I used the RioRondo Saddle piece for the buckle. It is not adjustable but I do like the look.  Bit by RioRondo. Reins are braided floss of 3 strans.
This headstall has the RioRondo silver and buckle. The leather is 3/32 " in natural. I brown the edges and seal the leather with Tan Kote.  Romel Reins.

Here is a headstall using the RioRondo halter buckles.

The ear piece here as you can see has the silver ear pieces from RioRondo,  I have added to it a trimmed piece from the stirrup silver.  Just cut and glue with Super Glue Gel.